
If you’re thinking about getting a conch piercing, you’re not alone—it’s one of the most striking and stylish ear piercings out there. But before you commit, let’s talk honestly. A conch piercing looks amazing, but it also comes with real challenges—like pain, aftercare, healing, and lifestyle adjustments. In this guide, you’ll learn the 7 brutal truths about conch piercing you must know, plus 5 meaningful benefits to help you decide with confidence. We’ll cover inner vs. outer conch piercing, conch piercing healing time, conch piercing pain, jewelry choices, and more. You’ll walk away with a clear, supportive, and realistic understanding—no judgment, just facts.
What Is a Conch Piercing?
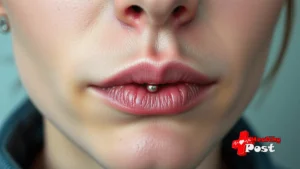
Your “conch” is the large curved shell-like part of your ear—the inner bowl that funnels sound. A conch piercing goes through this cartilage. There are two main styles:
- Inner conch piercing: through the inner bowl; usually fitted with a flat-back stud.
- Outer conch piercing: through the flatter outer rim of the conch; often styled with a hoop that hugs the ear.
A conch piercing is bold yet versatile. You can keep it minimal with a tiny gemstone stud, or go dramatic with a statement hoop. Either way, it’s a standout placement. But as with any cartilage piercing, it requires patience and consistent aftercare.
Inner vs. Outer Conch Piercing (Quick Comparison)
Below is a clear, visual comparison to help you quickly see which option fits your lifestyle and healing preferences.
| Feature | Inner Conch Piercing | Outer Conch Piercing |
|---|---|---|
| Placement | Through the inner “bowl” of the ear | Through the flatter outer portion of the conch |
| Typical Starter Jewelry | Flat-back labret stud | Flat-back stud or larger hoop after healing |
| Aesthetic | Minimal, sleek, center-focused | Bold, ear-hugging hoop look |
| Conch Piercing Pain (Perceived) | Moderate to high (dense cartilage) | Moderate (still cartilage) |
| Conch Piercing Healing Time | ~6–12+ months | ~6–12+ months |
| Sleeping Impact | Can be uncomfortable on that side for months | Same—avoid pressure |
| Snag Risk | Lower with a fitted stud | Higher if healed with a hoop |
| Best For | Clean, subtle look that’s easy to pair with multiple piercings | Statement hoop lovers who want a bolder profile |
Tip: Starting with a stud (not a hoop) is often recommended for a smoother healing period. You can switch to a hoop later, once your piercer confirms you’re healed.
The 7 Brutal Truths About Conch Piercing
1) It hurts more than a standard lobe piercing—conch piercing pain is real
Let’s be honest: cartilage is denser than the earlobe. Most people rate conch piercing pain as a solid 6–8 out of 10 during the moment of piercing, followed by a throbbing ache for a few hours. The pain isn’t permanent, but tenderness can linger for weeks.
- The piercing moment: sharp, pressurized sensation.
- The next 24–72 hours: warmth, swelling, and sensitivity.
- The first few weeks: occasional stings if you bump or lie on it.
If you’re pain-sensitive, plan your appointment on a calm day, eat beforehand, and breathe steadily. A skilled piercer makes a big difference.
2) The conch piercing healing time is longer than you think
Cartilage heals slowly because it has limited blood supply. A realistic conch piercing healing time is 6–12 months—and sometimes longer. You can feel “fine” by month 3, but the piercing still isn’t fully stable. Switching jewelry too soon or sleeping on it can set you back.
- Expect swelling for 2–4 weeks.
- Expect intermittent crusties and mild irritation for months.
- True “forget it’s there” stability can take up to a year.
This doesn’t mean it’s hard the whole time, but consistency matters.
3) Sleeping on it can sabotage your progress
Side sleepers, take note. Pressure is the enemy of cartilage healing. Regularly sleeping on a fresh conch piercing can cause:
- Prolonged swelling
- Persistent tenderness
- Piercing bumps (hypergranulation)
- Inward migration or shifting angle
Solutions:
- Use a donut travel pillow to keep your ear suspended.
- Sleep on the opposite side or on your back.
- Consider a piercing pillow—a small cushion with a hole in the middle.
4) Hoops look amazing—but they’re not always ideal for healing
Yes, the classic outer conch piercing hoop is stunning. But hoops can move more, catch on clothing, and add pressure—especially on fresh piercings. Many professional piercers advise healing with a high-quality flat-back stud first and switching to a hoop after you’re fully healed.
- Hoops = more motion and friction
- Studs = more stability and fewer snags
If your heart is set on a hoop, talk to your piercer. Some ear shapes allow a carefully sized, high-polish ring for healing, but it’s not the norm.
5) Low-quality jewelry will cause issues
Nickel-heavy alloys, rough finishes, and poor fit can mean itching, redness, and never-ending irritation. For a conch piercing, material matters. Look for:
- Implant-grade titanium (ASTM F-136)
- 14k–18k solid gold (not plated)
- Niobium
- High-polish surgical steel (if you’re not sensitive)
Get the right post length. Too short = pressure and embedding. Too long = movement and bumps.
6) Not all bumps are infections—and antibiotics won’t fix everything
Conch piercings can develop raised bumps. These are often due to pressure, trauma, or a reaction to jewelry—not true bacterial infections. Overusing antibiotics (or harsh chemicals) can actually make things worse.
Common non-infection culprits:
- Sleeping on the piercing
- Tight jewelry
- Snagging on hair, masks, or headphones
- Low-quality metal
Infection red flags:
- Intense, spreading redness
- Hot to the touch
- Thick yellow/green discharge with odor
- Fever or feeling unwell
If you suspect infection, see a professional. Otherwise, the remedy is usually reducing pressure, improving jewelry, and gentle aftercare.
7) You’ll need to adjust your routines—hair, headphones, and workouts
For the first few months, you’ll want to be mindful of:
- Over-ear headphones: switch to in-ear buds or bone conduction temporarily.
- Hair and styling tools: keep hair pulled back; be careful with brushes and straighteners.
- Helmets and hats: avoid tight, abrasive gear on the piercing side.
- Gym and yoga: wipe down equipment; avoid putting your ear on sweaty mats.
- Swimming: avoid pools, hot tubs, lakes, and ocean water for the first 4–6 weeks.
It’s a lifestyle tweak—temporary, but real.
5 Benefits of Conch Piercing
Even with the tough parts, a conch piercing can be incredibly rewarding. Here are five benefits to keep in mind:
Benefit 1: Instant statement with minimal effort
A single conch piercing can transform your ear profile. Whether you choose an inner conch piercing with a delicate gemstone or an outer conch hugging hoop, it elevates even a simple jeans-and-tee outfit.
Real-life example: If your workplace is conservative, a tiny flat-back stud can remain subtle. For nights out, switch to a bold hoop after healing for dramatic impact.
Benefit 2: Versatility across styles
You can keep it classy with white gold and diamonds or go edgy with black titanium or chunky hoops. It works with elegant, streetwear, minimalist, or boho vibes. Few piercings offer this much styling flexibility.
Benefit 3: Complements curated ears beautifully
If you already have helix, rook, or lobe piercings, a conch piercing anchors the look. It balances multiple small studs or serves as a bold focal point. Piercers often recommend it for “curated ear” designs because it sits centrally and ties everything together.
Benefit 4: Long-term satisfaction once healed
Yes, the conch piercing healing time is a commitment—but the payoff is a stable, comfortable piercing that you barely notice day-to-day. Many people report it becomes one of their favorite, lowest-maintenance piercings once fully healed.
Benefit 5: Endless jewelry options post-heal
After healing, you can play with:
- Seamless hoops and clickers
- Decorative studs with chains
- Gem clusters and opals
- Custom-fitted rings that perfectly hug your ear shape
This keeps the piercing fresh and fun for years.
Conch Piercing Healing Time: What to Expect
A realistic timeline helps set expectations and keeps you motivated.
- Week 1–2:
- Swelling, warmth, and tenderness
- Clear/white lymph “crusties” are normal
- Avoid touching; clean gently twice daily
- Week 3–6:
- Sensitivity decreasing
- Occasional stings if bumped
- Keep pressure off; avoid sleeping on it
- Month 2–4:
- Feels mostly okay, but still vulnerable
- Don’t change jewelry on your own yet
- Reduce cleanings to once daily if advised by your piercer
- Month 4–6:
- More stable; fewer crusties
- If everything looks great, your piercer may allow a jewelry change
- Month 6–12+:
- Full healing for many people
- Some need longer—don’t rush a hoop if tender
Remember: healing is individual. Your anatomy, lifestyle, aftercare consistency, and jewelry all influence your conch piercing healing time.
Conch Piercing Pain: Honest Breakdown
Pain varies—but here’s a practical guide:
- During the piercing: short, intense pressure; deep “crunch” sensation is normal.
- Afterward (first day): throbbing ache; over-the-counter pain relief can help (follow label or your healthcare provider’s guidance).
- Triggers during healing: snagging on sweaters, brushing hair, masks, over-ear headphones, sleeping on it.
Pain-lowering tips:
- Choose an experienced piercer with sterile needle technique (avoid piercing guns).
- Eat and hydrate before your appointment.
- Practice slow, steady breathing during the piercing.
- Wear button-up tops and tie your hair back for the first weeks.
- Use a donut pillow for sleep.
Aftercare: Do’s and Don’ts
Simple, consistent care beats complicated routines.
Do:
- Clean twice daily with sterile saline wound wash or a saline spray recommended by your piercer.
- Pat dry gently with clean, disposable paper towels (not fuzzy cloth).
- Keep hair and products (dry shampoo, hairspray) away from the area.
- Wash hands before any contact.
- Check jewelry ends occasionally—snug but not tight; if unsure, see your piercer.
Don’t:
- Twist, rotate, or remove the jewelry during healing.
- Use alcohol, hydrogen peroxide, Neosporin, or harsh soaps.
- Sleep on the piercing.
- Submerge in pools, hot tubs, lakes, or ocean for the first 4–6 weeks.
- Change jewelry by yourself early—wait for professional confirmation of healing.
Pro tip: If you see a bump forming, assess the cause—pressure, tight jewelry, snags—and address that first. Saline soaks and no-touch care often help.
Jewelry Guide: Studs, Hoops, and Materials
Starter jewelry:
- Flat-back labret stud with a slightly longer post to accommodate swelling
- Implant-grade titanium for low reactivity and lightweight comfort
After healing:
- Clicker hoop or seamless ring for an outer conch piercing look
- Decorative flat-back studs for inner conch piercing styling
- Solid 14k–18k gold for a luxe upgrade
Fit matters:
- Too tight = pressure bumps, embedding risk
- Too loose = movement, friction, and irritation
- Ask your piercer for a downsize appointment 6–8 weeks in if swelling reduces
Finish matters:
- High-polish surfaces reduce irritation compared to rough or textured finishes
Cost, Appointment Tips, and Red Flags
Typical costs vary by region and studio quality:
- Piercing service: 40–40–40–100+
- Jewelry: 30–30–30–200+ (titanium vs. solid gold or gemstones)
- Total: 70–70–70–300+, depending on your choices
Appointment tips:
- Check portfolio photos for inner and outer conch piercing examples.
- Ask about sterilization and jewelry materials (ASTM F-136 titanium, solid gold).
- Confirm the plan for aftercare and follow-up downsizing.
- Bring a hair tie and avoid heavy hair products on the day.
Red flags:
- Piercing guns (never for cartilage)
- Vague answers about jewelry materials
- No sealed, sterile needle or single-use setup
- Pressure to heal with a hoop when your anatomy suggests otherwise
FAQs
Q: Is a conch piercing more painful than a helix? A: Many people say yes, slightly—because the conch is thicker. Pain is brief, but tenderness can last a few weeks.
Q: Can I wear AirPods or over-ear headphones during healing? A: In-ear buds are usually okay if they don’t press on the jewelry and are kept clean. Over-ear headphones often cause pressure; avoid for the first few months.
Q: How soon can I switch to a hoop? A: For most, after complete healing—often 6–12 months. Your piercer should confirm readiness.
Q: What if my conch piercing develops a bump? A: First, reduce pressure and friction—change sleep habits, manage hair, and ensure proper jewelry fit. Stick to gentle saline care. If you suspect infection (spreading redness, heat, thick discharge, fever), see a professional.
Q: Does it affect hearing? A: A healed conch piercing doesn’t typically change hearing. During healing, swelling and tenderness may make you more aware of your ear.